Guide
Building a home server with Proxmox
How I built a budget home server from used parts, what runs on it, and why I chose OpenCloud over Nextcloud and Seafile.
- linux
- proxmox
- self-hosting
- home-server
On this page
This is the home server I built in mid 2026: a small NAS-style box running Proxmox VE, with a few services I use every day. It replaces Google Drive for my files, keeps my notes in sync, runs game servers to play with friends, and has room for smart home and CCTV later on.
This guide covers the parts I chose, their cost, how the storage is laid out, and each service I run. It also tells the longer story of finding a Google Drive replacement. I tried Nextcloud and Seafile before settling on OpenCloud, and I haven’t looked back.
Work in progress: the server is still growing, and so is this guide. Sections marked planned aren’t built yet.
About the commands: most commands here run as root in the Proxmox host shell (Node → Shell in the web UI) or inside a container’s console. I’ve kept them to the important ones; the Proxmox web UI can do almost all of it by clicking too.
1. The hardware
I wanted something quiet and low-power with room for several hard drives. Most of the parts are used or bought from marketplaces, which kept the cost down a lot. The 8th-gen Intel CPU, for example, cost £22 on eBay.
| Part | What I used | From | Price |
|---|---|---|---|
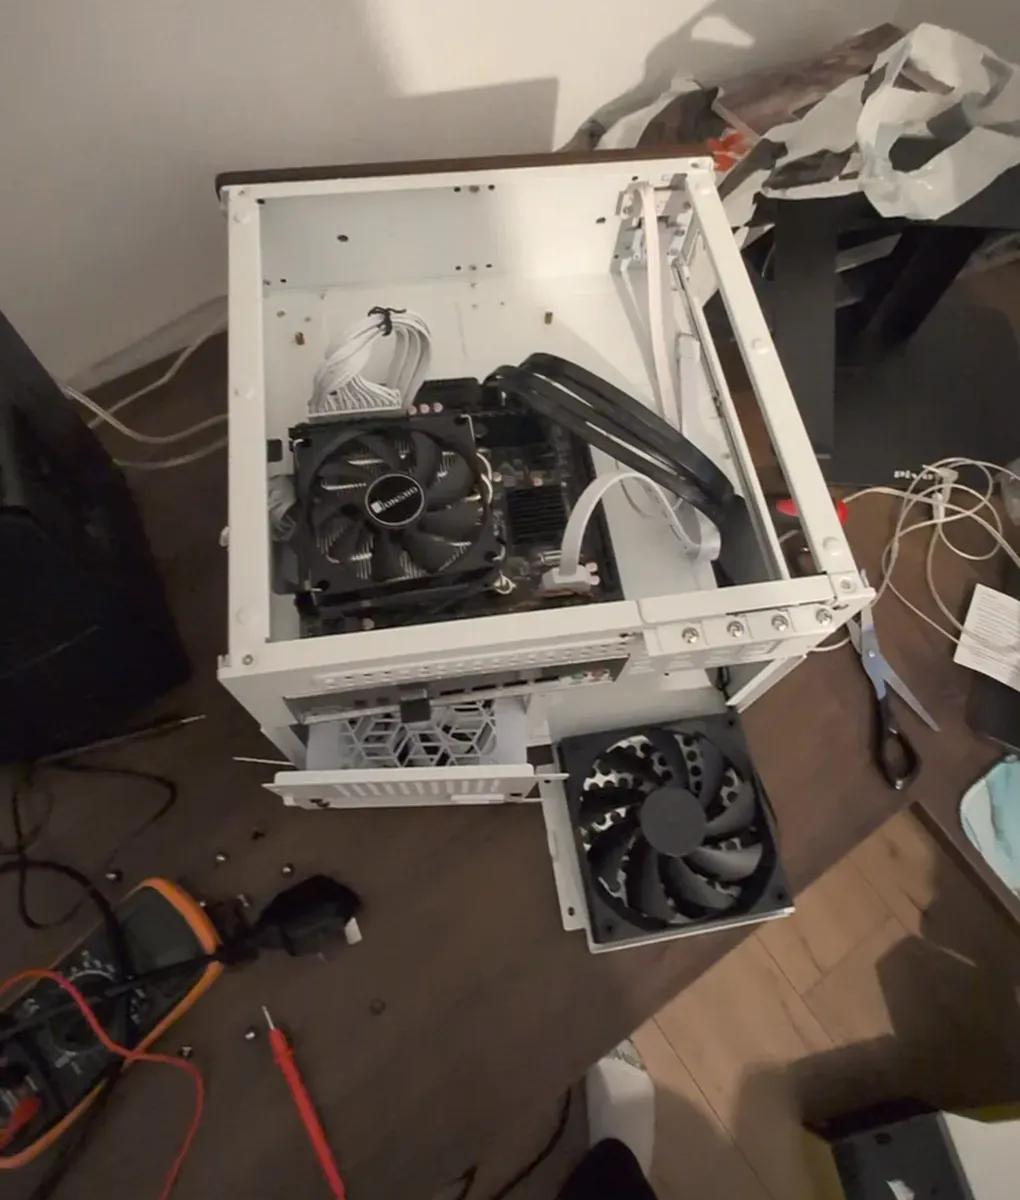
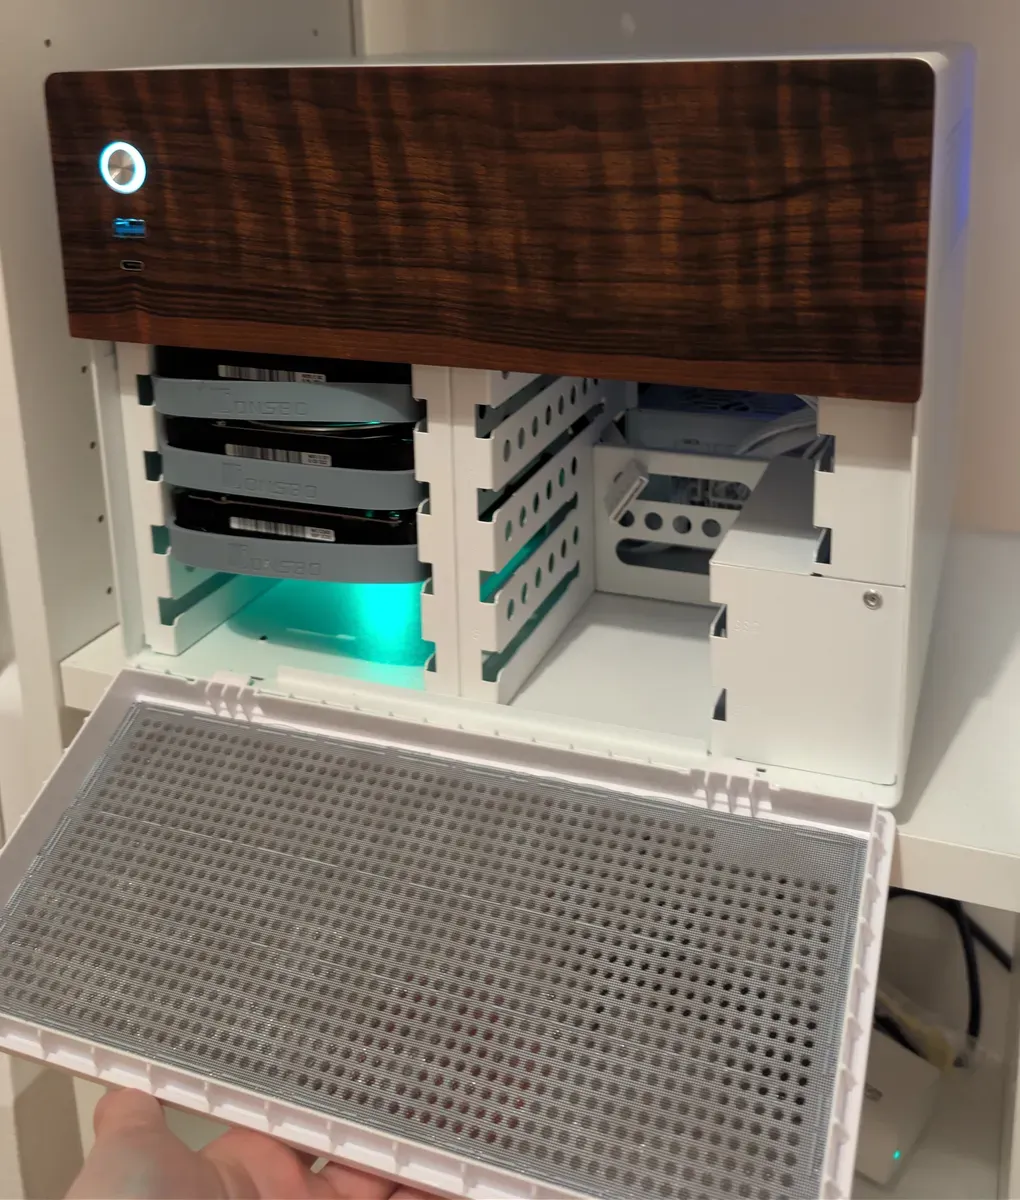
| Case | Jonsbo N4 NAS case (6× 3.5” bays, 2× 2.5”) | AliExpress | £107.07 |
| Motherboard | Intel C246 NAS board (8× SATA, 3× 2.5 GbE + 1× 1 GbE) | AliExpress | £94.70 |
| CPU | Intel Core i5-8500 (6 cores, UHD 630 graphics) | eBay | £22.00 |
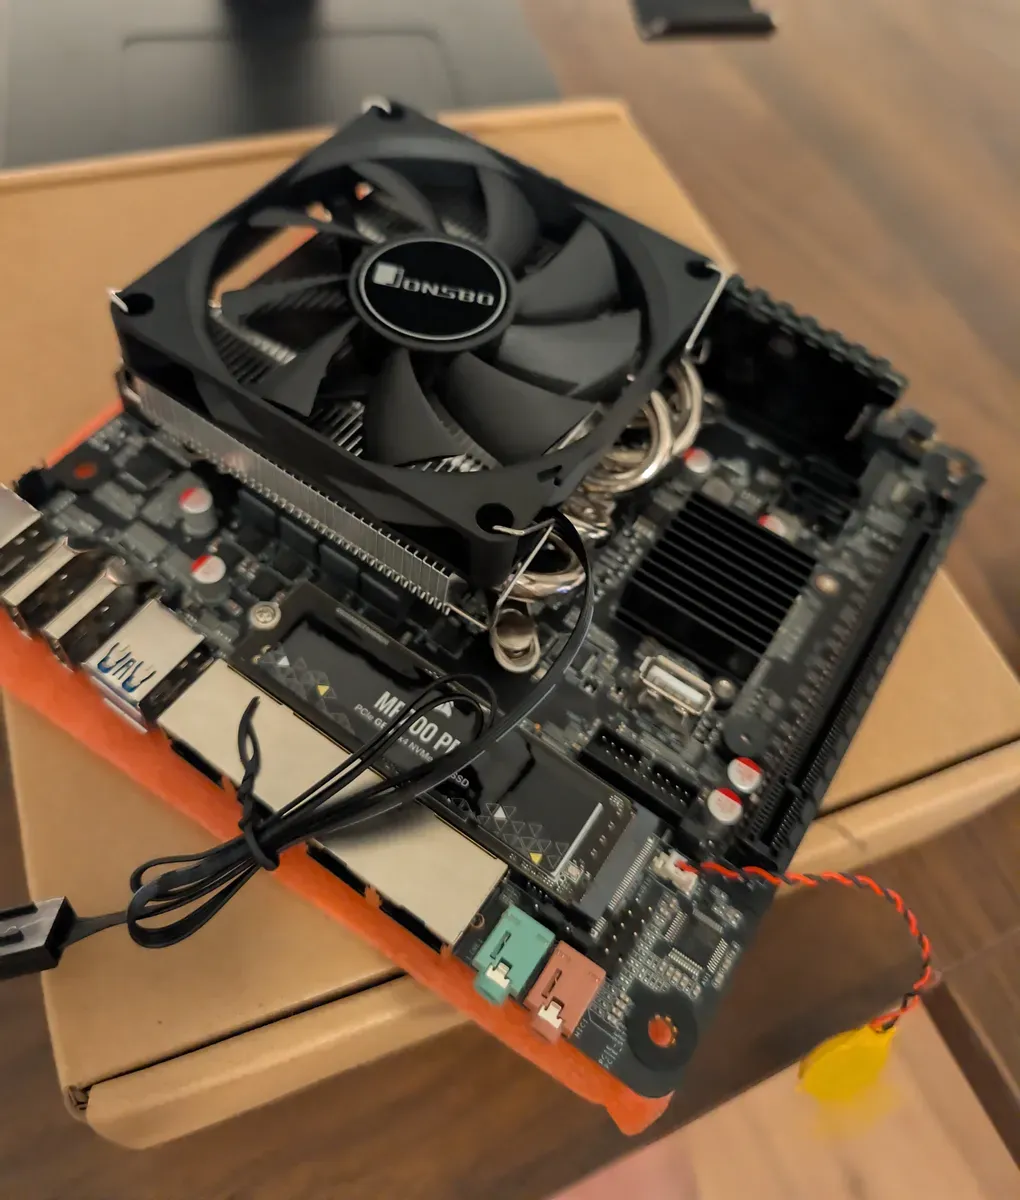
| CPU cooler | Jonsbo HP400S low-profile | AliExpress | £19.29 |
| Power supply | Corsair SF750 (SFX, 80 PLUS Platinum) | eBay | £92.51 |
| RAM | 32 GB Kingston DDR4 2666 MHz (single stick) | CeX | £82.50 |
| Boot SSD | Corsair MP700 PRO 2 TB NVMe | CeX | £172.50 |
| Hard drives | 2× WD Purple 4 TB (WD40PURZ) | CeX | £130.00 |
| Additional Hard drive | 1× WD Red Pro 4 TB (WD4001FFSX) | CeX | £80.50 |
| and | Total | £801.07 |
A few notes on these choices:
- The CPU’s built-in graphics matter. The UHD 630 can handle hardware video transcoding and AI object detection for CCTV, so the server doesn’t need a graphics card.
- The NVMe drive is overkill. It’s a PCIe Gen5 drive running at Gen3 speeds, because that’s all the motherboard supports. It was a good deal, though, and it’s still far faster than the hard drives.
- WD Purple drives are surveillance drives, made to be written to 24/7. They’re fine for general storage and ideal for CCTV recordings.
- One RAM stick leaves a slot free to go to 64 GB later.
From the bare motherboard to the finished server on the shelf:
2. Proxmox and storage
Proxmox VE
is a free, Debian-based operating system for running virtual machines (VMs)
and containers. Everything is managed from a web UI at
https://<server-ip>:8006. I’m running Proxmox VE 9.2.
How the storage is split
There are two places to store things, and each one gets what it’s best at:
- The NVMe SSD holds Proxmox itself and the system disk of every container and VM, plus databases and game worlds. Anything where speed matters goes here.
- The three hard drives form a ZFS
pool called
datapoolin a RAIDZ1 layout. That gives about 7.3 TB of usable space and survives one drive failing. Bulk data goes here: files, notes, CCTV recordings and backups.
Pitfall: it’s tempting to use a spare SSD as a cache for the ZFS pool. With 32 GB of RAM a read cache (L2ARC) helps very little. A “special vdev” on a single SSD is worse: if that SSD dies, the whole pool is lost. Put the fast stuff straight on the NVMe instead and you get the speed with none of the risk.
First-time setup
Switch to the free update repository. A fresh Proxmox install points at the paid enterprise repositories, so updates fail without a subscription. In the web UI go to Node → Updates → Repositories, disable the two enterprise entries, then Add → No-Subscription. Then update:
apt update && apt full-upgrade -yCap the ZFS memory cache. ZFS uses spare RAM as a read cache (the ARC). Capping it at 4 GB makes sure containers and VMs always get the rest:
echo "options zfs zfs_arc_max=4294967296" > /etc/modprobe.d/zfs.confupdate-initramfs -u -k allCreate a dataset for each kind of data, with compression on. Datasets are like folders that can each have their own settings and snapshots:
zfs create -o compression=lz4 datapool/notes
zfs create -o compression=lz4 datapool/opencloud
zfs create -o compression=lz4 -o recordsize=1M -o atime=off datapool/cctv
zfs create -o compression=lz4 datapool/backups
Check the integrated graphics are visible, so containers can use them later:
ls -l /dev/driYou should see renderD128. If /dev/dri is missing, enable the integrated
graphics in the BIOS.
3. Containers, VMs and what runs where
Proxmox can run two kinds of guests:
- LXC containers share the host’s Linux kernel. They’re very light, start in seconds and can share the integrated graphics. I use these for almost everything.
- VMs are fully separate machines. I use them only where it’s worth it: for anything exposed to the internet (game servers), and for Home Assistant, whose official install is a whole OS image.
Each service gets its own container with a fixed IP address on the home network, so a problem in one can’t take down the others.
| Service | Type | Resources | Status |
|---|---|---|---|
| Tailscale | LXC | 1 core, 512 MB | Running |
| OpenCloud | LXC | 2 cores, 2 GB | Running |
| Syncthing (notes) | LXC | 1 core, 512 MB | Running |
| Game servers | VM | 6 cores, 10 GB | Running (Valheim) |
| Home Assistant | VM | 2 cores, 4 GB | Planned |
| Frigate (CCTV) | LXC | 4 cores, 3 GB | Planned |
| Immich (photos) | LXC | 4 cores, 6 GB | Tried, stopped |
The core and RAM numbers are limits, not reservations. An idle container uses almost nothing, so it’s fine for them to add up to more than the machine has.
Why Immich is stopped: Immich is an excellent self-hosted Google Photos replacement, and it ran well here with hardware transcoding on the iGPU. In the end I stayed on Google Photos because it’s simpler for the rest of my family to use. Its data is kept on the pool in case I bring it back.
The “Docker in LXC” recipe
Most services are easiest to run with Docker, so I reuse the same recipe for each container:
- Create the container (Create CT, top right) from the
debian-13-standardtemplate. Tick Unprivileged and Nesting, put the disk onlocal-lvm(the NVMe), and give it a static IP. - Under Options → Features, tick keyctl and nesting.
- In the container’s console, install Docker:
apt update && apt full-upgrade -y && apt install -y curl
curl -fsSL https://get.docker.com | sh
To give a container access to a dataset on the pool, add a bind mount from the host:
pct set 109 -mp0 /datapool/opencloud,mp=/mnt/opencloudPitfall: in an unprivileged container, user IDs are shifted by 100000 on the host. A user with ID 1000 inside the container is 101000 on the host. Set the folder’s owner to match, or the container gets “permission denied”:
chown -R 101000:101000 /datapool/opencloud
4. Remote access with Tailscale
Tailscale is a VPN that connects your devices to each other without opening any ports on the router. I run it as a subnet router in a tiny container, which makes the whole home network reachable from my phone or laptop anywhere. With the Tailscale app switched on, I use the same addresses as at home.
It also survives moving house or changing internet provider, because the server connects out to Tailscale rather than waiting for connections in.
The container needs access to the host’s TUN device. Add these two lines to
/etc/pve/lxc/<id>.conf on the host:
lxc.cgroup2.devices.allow: c 10:200 rwm
lxc.mount.entry: /dev/net/tun dev/net/tun none bind,create=file
Then inside the container, install Tailscale, allow routing and advertise the home network:
curl -fsSL https://tailscale.com/install.sh | shecho 'net.ipv4.ip_forward = 1' > /etc/sysctl.d/99-tailscale.conf
sysctl -p /etc/sysctl.d/99-tailscale.conftailscale up --advertise-routes=192.168.1.0/24 --accept-dns=falseFinally, in the Tailscale admin console, approve the route and disable key expiry for this machine, otherwise it logs out every 180 days.
Nothing else is port-forwarded. The only exception is the game servers, because friends shouldn’t need a VPN just to join a game.
5. Files: Nextcloud → Seafile → OpenCloud
This was the part that took the longest. I wanted a Google Drive replacement with a few must-haves:
- Lots of files, synced quickly between my PC, laptop and phone
- A normal folder on the PC, so any app can open and save files
- Editing documents and spreadsheets on every device, phone included, with changes saved back to the server
Attempt 1: Nextcloud
Nextcloud is the best-known option and does far more than files: calendars, contacts, photos, office documents and a big app store.
I first tried mounting it as a drive in GNOME Files through Online Accounts (WebDAV). Files opened fine, but saves from an office app never made it back to the server. The desktop sync client fixed that on the PC.
Phones were the bigger problem. I added Nextcloud Office (Collabora) for editing, which needed the container’s RAM raised to 6 GB. Editing in the Nextcloud app worked, but the overall phone experience felt clunky. Opening files in the ONLYOFFICE app saved some formats in place but made duplicate copies for others. For what I needed, it was a lot of server for a mediocre result.
Attempt 2: Seafile
Seafile is lighter and known for very fast sync. I set it up with ONLYOFFICE Docs as its online editor, and it worked.
Even so, it was still a sizeable stack: Seafile, a MariaDB database, Redis, a Caddy proxy and an ONLYOFFICE document server, again around 6 GB of RAM. Seafile also stores files in its own block format, so the data on the server isn’t a folder of your files, and backups need Seafile’s own method.
Where I ended up: OpenCloud
OpenCloud is a newer project (2025), a fork of ownCloud Infinite Scale. It does one thing, files, and does it well. And I love it.
What won me over is how simple it is:
- No database to look after. The whole thing runs comfortably in 2 GB of RAM.
- Modern apps for desktop, Android and iOS (all on the download page), and sync is extremely fast.
- Spaces, shared folders like Google’s Shared Drives, for things like house documents.
- No office server at all. Instead of running an online editor, I edit files directly with ONLYOFFICE on every device: the desktop editors on Fedora, and ONLYOFFICE Documents on Android and iOS. It’s the same editor everywhere, files open the same everywhere, and the server only has to store and sync them.
That last point is the big one. Dropping the online editor removed most of the complexity, and nothing was lost.
Setting up OpenCloud
OpenCloud is set up with the official opencloud-compose files, which include Traefik as the web server. Inside a Docker LXC:
git clone -b stable-7.2 https://github.com/opencloud-eu/opencloud-compose.git /opt/opencloudCopy .env.example to .env and set at least:
OC_DOMAIN=cloud.example.com
OC_DATA_DIR=/mnt/opencloud/data
INITIAL_ADMIN_PASSWORD=<something random>
Then start it:
docker compose up -dThe OpenCloud docs cover every setting.
Pitfall: OpenCloud requires HTTPS and a domain name, because its login uses OpenID Connect. Plain
http://<ip>won’t let you log in.
My setup for that, without exposing anything to the internet:
- Move the domain’s DNS to Cloudflare (free plan).
- Add an
Arecord forcloud.example.compointing at the container’s private home IP, set to DNS only (grey cloud). Outside the home network, it only works with Tailscale on. - Create a Cloudflare API token with Edit zone DNS permission, and have Traefik get a Let’s Encrypt certificate using the DNS challenge. This works even though the server isn’t reachable from the internet, and it renews by itself.
Pitfall: some routers block DNS answers that point to private addresses (“DNS rebind protection”). Check with
getent hosts cloud.example.com. If it prints nothing, allow your domain in the router’s settings.
Using it
- PC and laptop: install OpenCloud Desktop from Flathub and pick a local folder to sync. It’s a normal folder, so GNOME Files and ONLYOFFICE work on it as usual, and saves upload within seconds.
- Phone: install the OpenCloud app, then edit with ONLYOFFICE Documents via Open with.
Pitfall: don’t edit files through a WebDAV mount (like GNOME Online Accounts). Saves from office apps may never reach the server. Use the sync client.
6. Notes: Obsidian with Syncthing
My Obsidian notes are a plain folder of Markdown files. Syncthing keeps an identical copy on the server, PC, laptop and phone. Obsidian on each device just opens the local folder.
Because the server copy is always on, my phone and PC stay in sync even when one of them is off. And because the server holds real Markdown files rather than a database, I can back them up easily and script things with them later.
7. Game servers
Game servers run in their own VM, because they’re the one thing reachable from the internet, so they get full isolation. It’s a Debian VM with Docker, with up to 10 GB of RAM. That’s enough for one or two game servers at a time.
Valheim is running at the moment, with Minecraft and Enshrouded planned. Each game only needs its own ports forwarded on the router to the VM, for example UDP 2456–2457 for Valheim.
8. Backups
ZFS redundancy is not a backup. It protects against a drive dying, not against deleting the wrong folder, a bad command, theft or fire. The goal is the 3-2-1 rule: 3 copies, on 2 different devices, 1 off-site.
- Done: a nightly Proxmox backup of every container and VM to the pool (Datacenter → Backup), keeping 7 daily, 4 weekly and 3 monthly copies.
- Planned: hourly ZFS snapshots with sanoid, as an undo button for deleted files.
- Planned: an off-site copy of the important datasets.
Pitfall: Proxmox container backups don’t include bind mounts. My OpenCloud files live on a bind-mounted dataset, so they need snapshots and an off-site copy of their own.
What’s next
- Home Assistant in a VM for smart home control
- Frigate for CCTV, using the iGPU for person and car detection
- Finishing the backup setup: snapshots and off-site
- Looking into reactivating immich for image storage, depending on personal requirement changes.